
Restring Baby Dollikin Arms
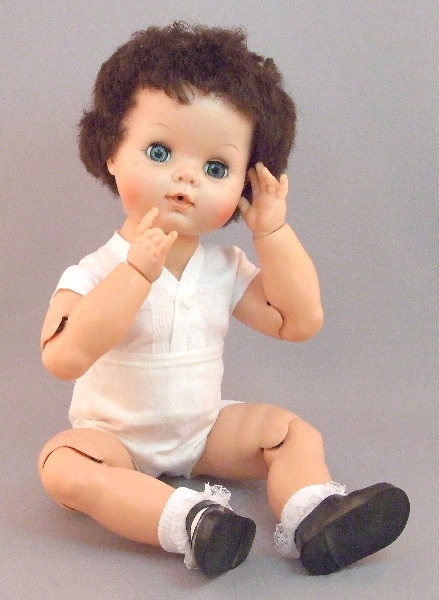
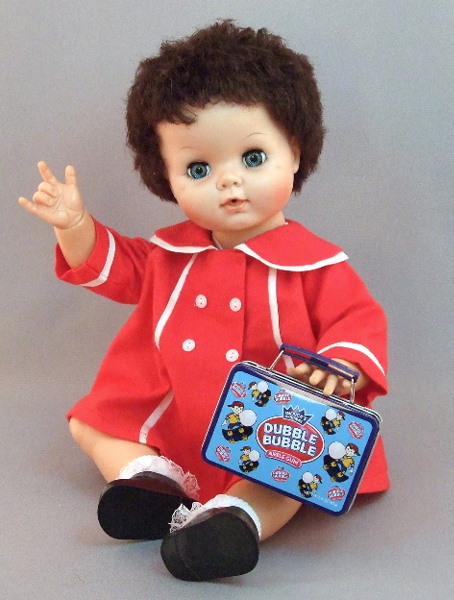
About Baby Dollikin
Baby Dollikin was made by the Uneeda Doll company in the late 1950's. She is a very unique multi-jointed babydoll with spring joints that hold on the arms, legs and head, and metal hinge-joints at elbows and knees. Her wrists twist and turn, also.
Baby Dollikin is all vinyl, but she is made of a thick vinyl material that is not quite the same as either hard vinyl or soft vinyl. Sometimes it feels a bit like crayon. The vinyl material was apparently very thick and viscous because many of the Baby Dollikin dolls have ripples and swirls in their vinyl. It's not uncommon to find bits of debris in the vinyl either. This vinyl is durable and holds it's color well, but may not be as flexible or resilient as other vinyl materials of that period.
Baby Dollikin is an especially pretty vintage babydoll, with a very sweet and pleasant expression. She is one of the most collectible vintage babies.
The Arms
Baby Dollikin's arms sometimes fall off. I haven't seen it happen with the legs but I suppose it's possible. These instructions for restringing have only been tested on the arms.
I am not a professional Doll Doctor: I am sharing this tutorial to show you what works for me.
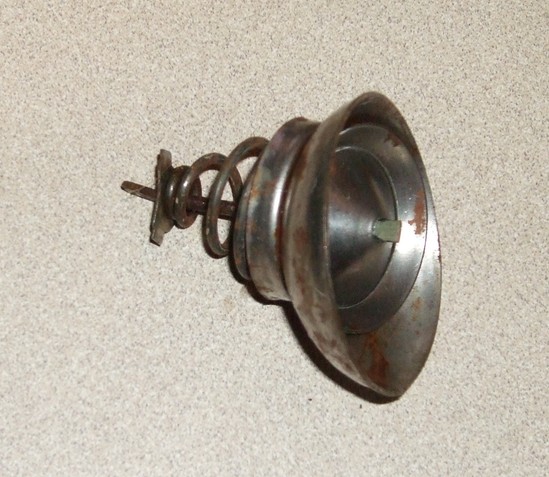
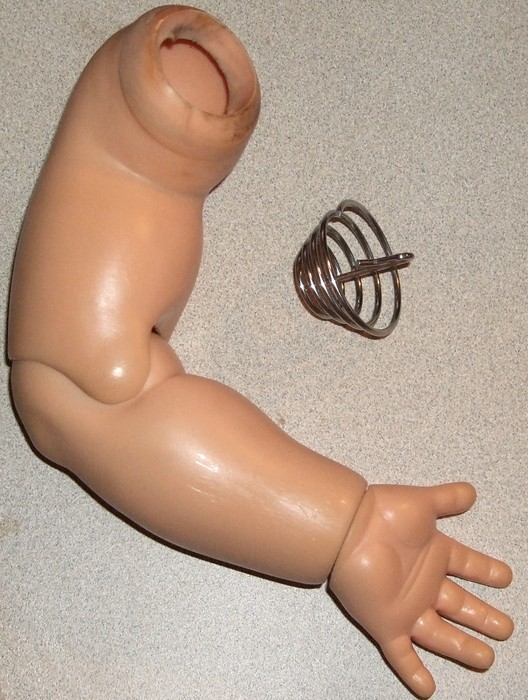
It's nearly impossible to get the arms back on again using Baby D's original parts. I've done it but after 4 hours of struggling and wrestling it only happened by accident or miracle. I'm not willing to try it again. The original springs and metal cups are held together with a cotter pin. Below is a photo of the entire mechanism:
Take off the Other Arm
This particular doll lost one arm. In order to string the arms back onto the doll, the other arm must also be removed. The arm might fall off if you try turning the arm or the spring mechanism. For me, that didn't work. But I did have a Baby D arm fall off in my hand one time just by adjusting the position. So you might get lucky, but at the time I did not think it was a lucky break.
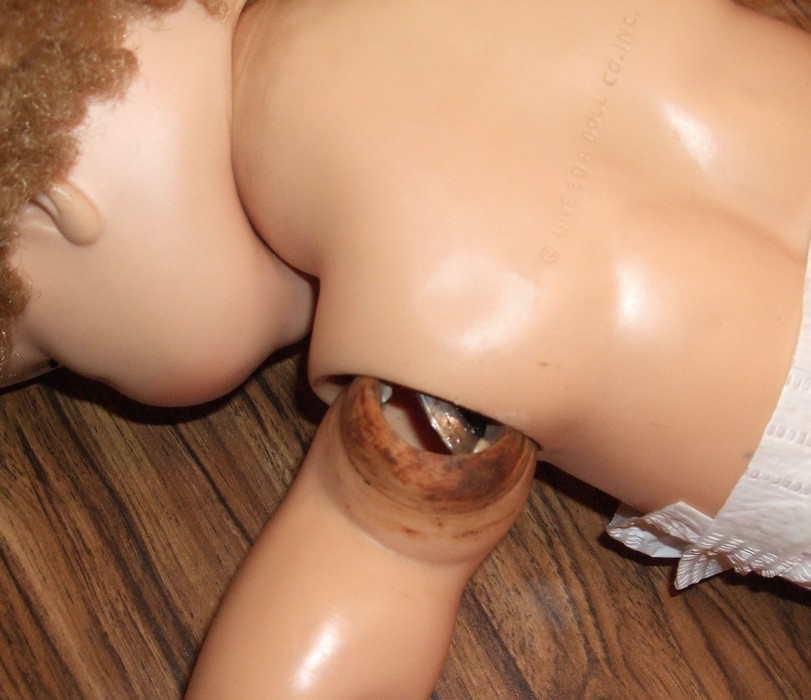
So here's what I did to get the arm off.... The photo above shows the arm pulled out so the metal disk inside the shoulder is visible. I heated the shoulder part of the arm for about 15-20 seconds using an ordinary hair blow dryer. (Don't use a heat gun, they're too hot and will usually cause damage to the vinyl.)
After the viny has warmed up a bit, use a small pliers to GENTLY but FIRMLY pull the metal piece out - so the arm comes off the doll. The vinyl is not very flexible and it tends to be brittle, so be careful.
Then remove any loose parts that are inside the doll body or the arm. Be sure to get them all, you don't want things rattling around in there. (Ask me how I know.)
If you know a guy who's handy with tools, it might be possible to cut the cotter pin with a wire cutter, but you need a big man-size wire cutter, not the kind used for crafts or electric wiring. I found a big wire cutter in my brother's shop and it was strong enough to cut the cotter pin, but whether there's room to get the large wire cutter jaws inside the arm hole is another question. Cutting the cotter pin will release the arm from the body.
Clean the Doll
It's a good idea to clean the doll at this point, if she needs it. With the arms off she'll be able to dry inside and out. You want her thoroughly dry before stringing her back together, so don't rush it. We have instructions on how to clean vintage dolls and restore their hair: Click the INDEX button at the bottom of this page.
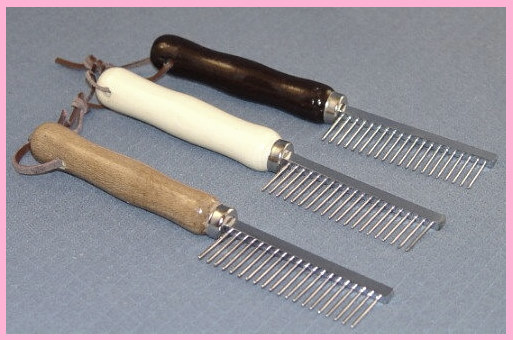
The hair on my doll was matted, but it combed out nicely after I shampooed it and applied a little comb in conditioner. I use a metal tooth pet comb to comb doll hair. The doll had no missing hair plugs, so her hair was actually very nice once it was combed.
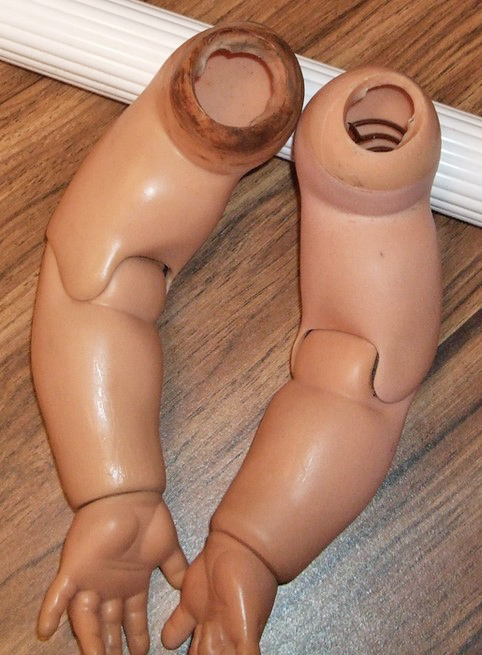
The doll may have some rust or grease around the joints after her bath. You can use WD40 to clean off the rust and grease. One arm in the photo above was cleaned, the other wasn't. ALSO, notice that one arm has a larger opening than the other. This can be a problem: I'm going to use a larger spring hook in that arm.
Perhaps the opening was larger to begin with, or maybe it was stretched because of the mechanism that was in it. Vinyl is not a rigid material, it can flex and stretch. It can also shrink and warp. No two dolls are going to be identical because of that - even though they came from the same mold.
Spring Hooks & Washers
Now that she's had her beauty treatments, here's a photo of the parts that will be inserted in each arm:

The spring hook (on the left) will be inserted first. The large metal washer will be inserted next. And the two felt circles will be last.
The purpose for the large washer is to prevent the spring hook from inverting. If the arm hole is too large, the spring hook might invert: the metal washer prevents this from happening. The felt circles prevent the metal washer from touching the vinyl. The washers are stainless steel, so they shouldn't rust. But just to be safe, the little bits of felt will help protect the vinyl.
1. SPRING HOOK... First, insert a spring hook into the ARM. Screw the spring hook into the hole in the arm, until it's all the way inside. (It is much easier if you use a small pliers for this.) Turn the spring hook COUNTER-CLOCKWISE to insert it. (Actually, I found out that not all spring hooks are made the same and some will need to be turned CLOCKWISE.) You might have to push down on the center hook to get it started. Continue turning the spring hook until it's all the way inside.
2. BIG WASHER... After you've inserted the spring hook, GENTLY but firmly insert a large washer in the arm. If necessary, heat the vinyl a bit to warm it (using an ordinary blow dryer) and then gently push the large washer inside the arm hole.
3. Next, use a hemostat or needlenose pliers to help you arrange the parts inside the arm. Poke the hemostat through the hole in the washer, and grab the hook that's in the center of the spring hook. Pull the hook through the washer.

4. Then slide two of the FELT CIRCLES onto the hook (the circles are cut in the center.) I used tweezers to push the felt circles where they belong.
5. Finally, loop the ELASTIC CORD on the hook and pull all the pieces up snug inside the arm. (If you have a hemostat, you can clamp the cord to hold everything in place.)
6. Do the same with the other arm.
Elastic Cord
Pick up one arm and pull the little hook out as far as you can. Attach the elastic cord through the hook (if it isn't attached already.)

Then thread both ends of the elastic cord through the length of PVC tube. The 1 1/4 PVC Tube is 3 1/8 inch long. The length may need to be adjusted if your Baby Dollikin is narrow in the chest width. There can be differences due to shrinkage and distortion of the vinyl. Hopefully the 3 1/8" length will work for everybody but that remains to be seen. It was the perfect length for my doll.
NOTE: The PVC pipe shown in the photo is a piece of novelty tubing that is fluted. Any plain old 1 1/4 PVC tube will work.

PVC & Elastic Cord
Insert the piece of PVC tube through the armhole in the doll's body. AT THIS POINT, MAKE SURE THE ARMS ARE WHERE THEY SHOULD BE: RIGHT SIDE on the RIGHT, LEFT SIDE on the LEFT! You don't want to put the arms on backward. (Ask me how I know.)
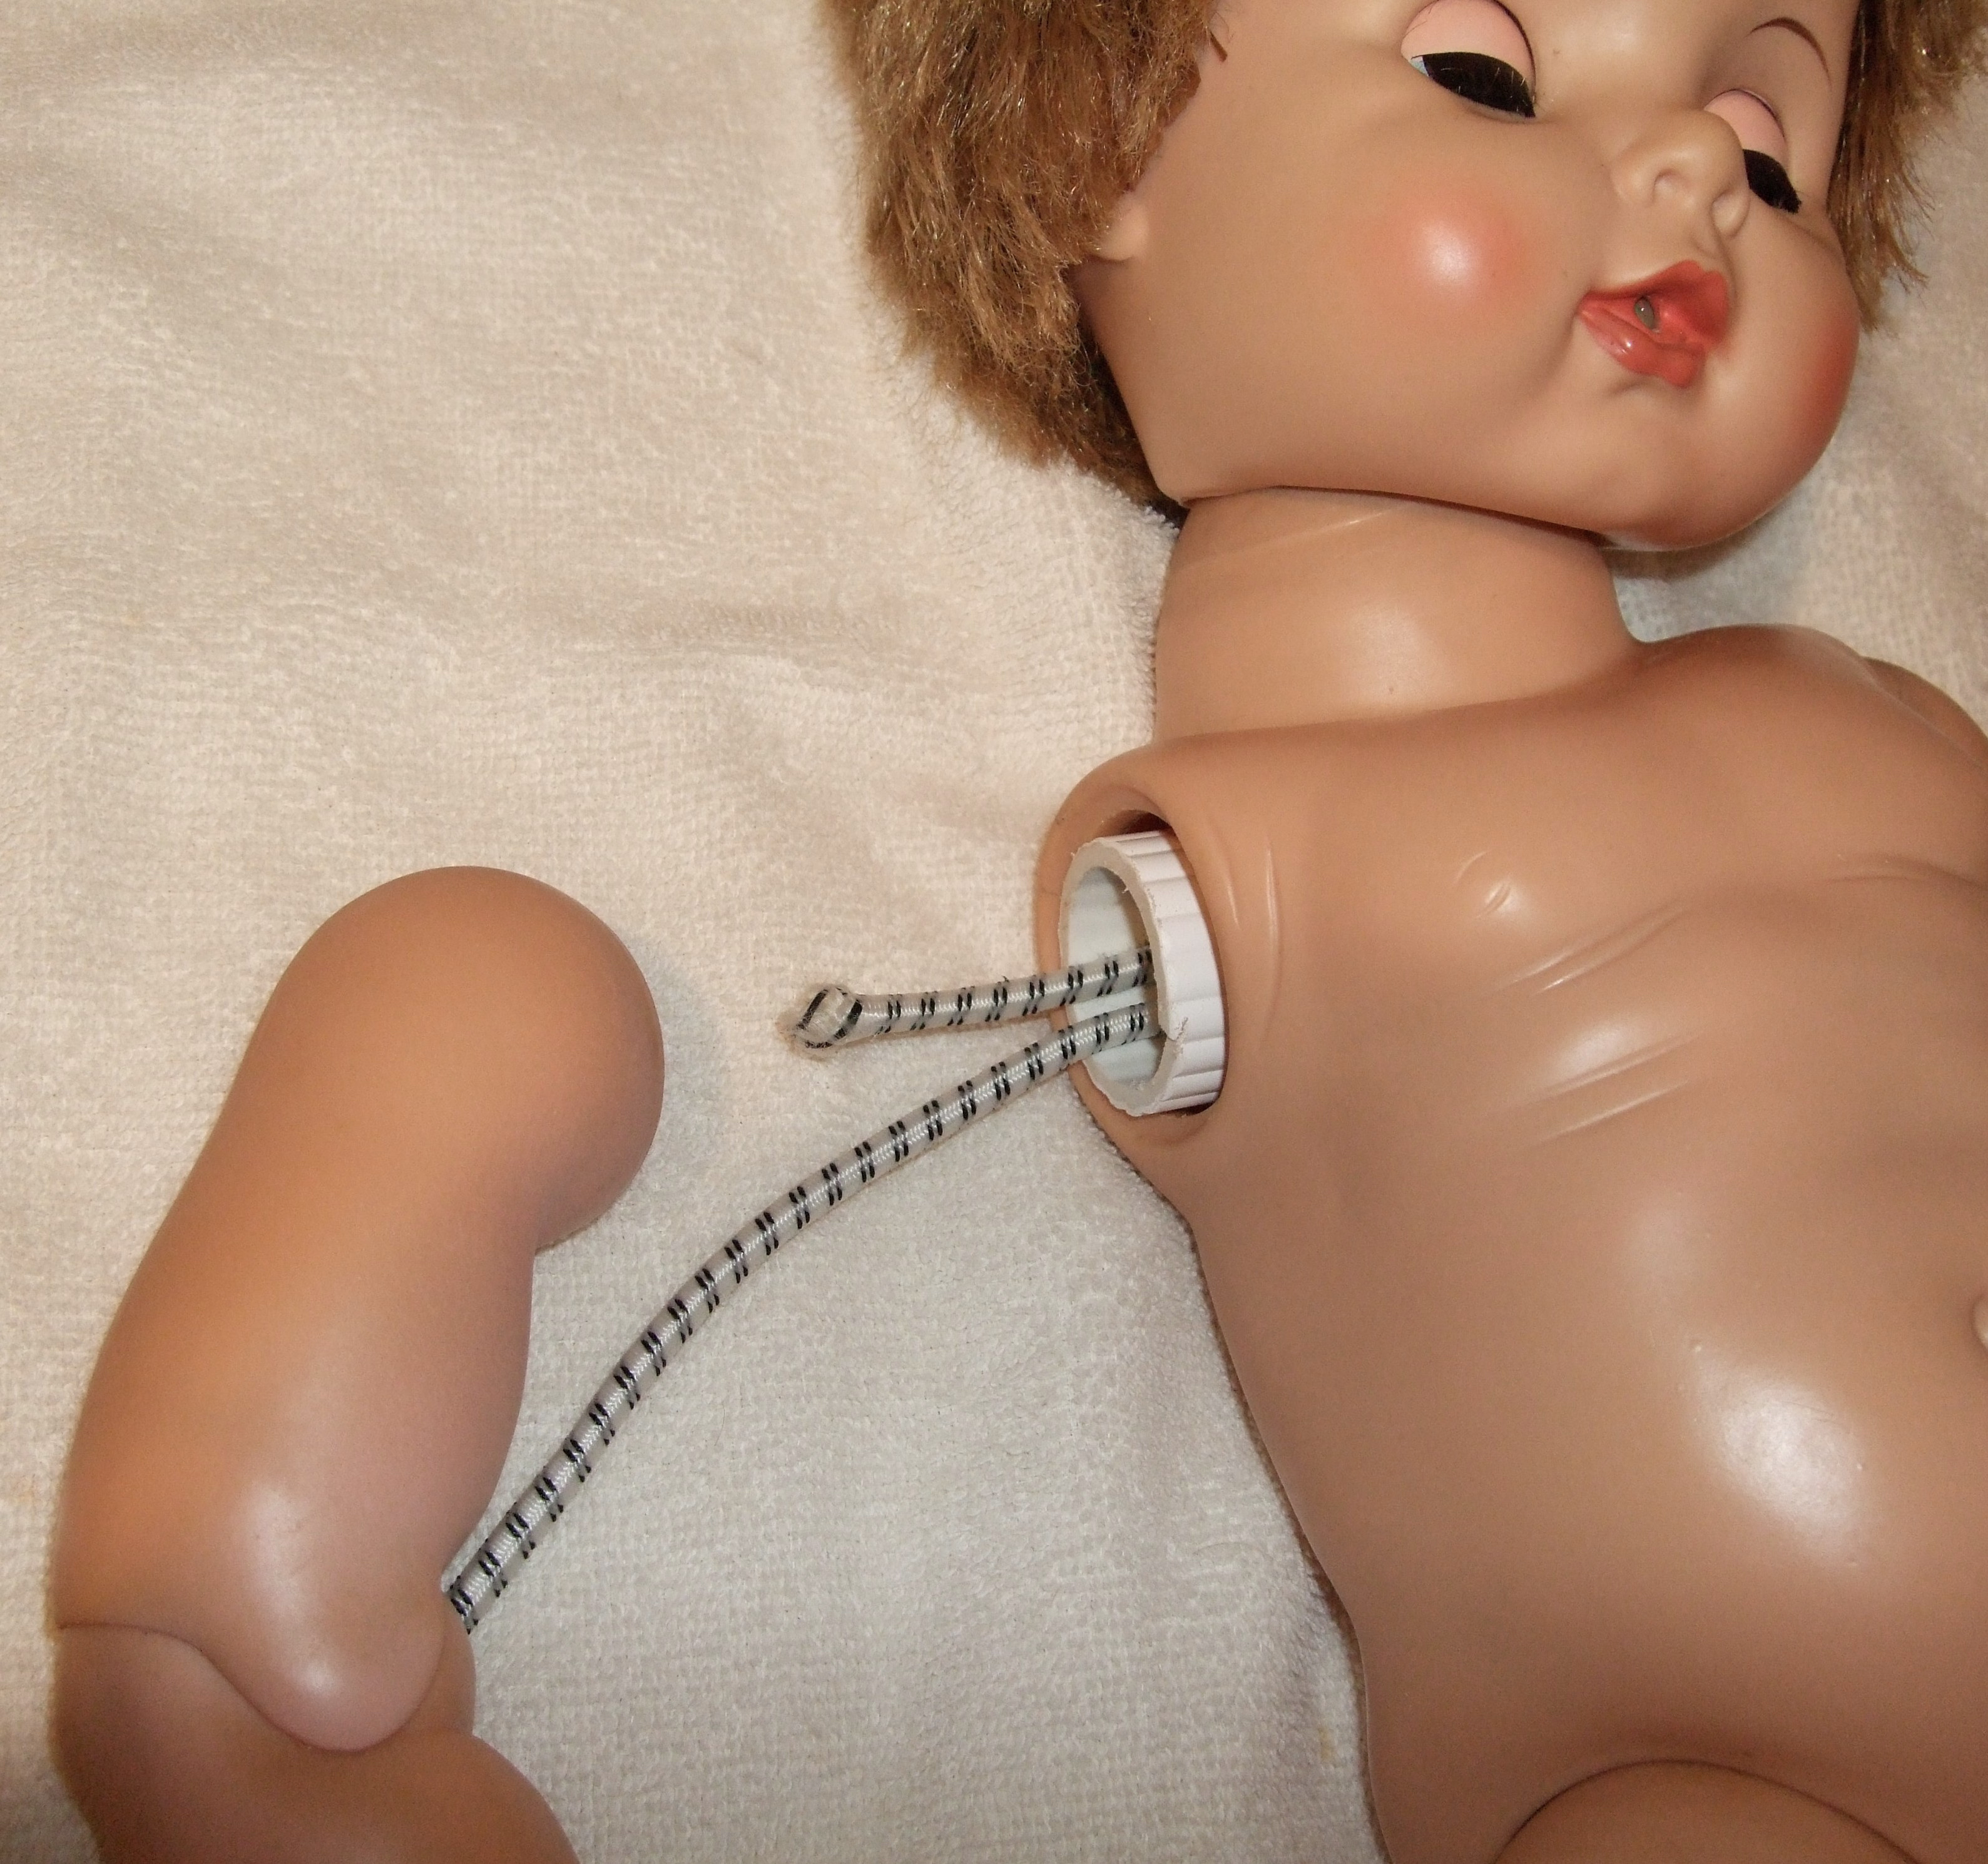
From the other side, grab the elastic cord and pull the arm up tight to the body. Now attach the hook from other arm to the elastic cord. Tie the two ends of the cord together ONCE only, and pull tight, until the arms are nice and snug and will be able to hold positions. You can make it tighter by pulling on one cord and then the other. When the arms are really snug and tight, then tie the cord together again to knot it. Tie it again, tight.
You might need help when pulling and tying: it's a lot to hang onto and an extra set of hands can be useful. I didn't have much trouble doing it by myself, though.
You may want to apply some good quality white craft glue to the knot; such as Elmers Household glue (NOT School glue!) The craft glue will help prevent the knot from slipping. I don't recommend using superglue for this: it might damage the elastic cords.
Trim the extra cord, leaving at least an inch or two (you don't want to trim too close to the knot!) Then push the ends of the cord and the knot inside the doll. Now she's done!
PVC Purpose
The purpose of the PVC tubing is to give additional support for the doll body so it doesn't cave in. Baby Dollkin's arms are big and heavy, so we need to use big heavy cord to hold them, which requires a lot of pressure on the cord to hold the arms firm. Sometimes old vinyl can't take that much pressure. I had a doll body collapse one time after I had restrung the doll. The vinyl body disintegrated into several pieces. So, I don't want to risk doing that to Baby D's body. The PVC takes the pressure instead.
The only drawback: when you rotate one arm, the other arm might turn as well. Both arms can be adjusted independently, but you may need to hang onto one as you turn the other. I would rather have to deal with this relatively minor problem, than risk caving in the doll body.
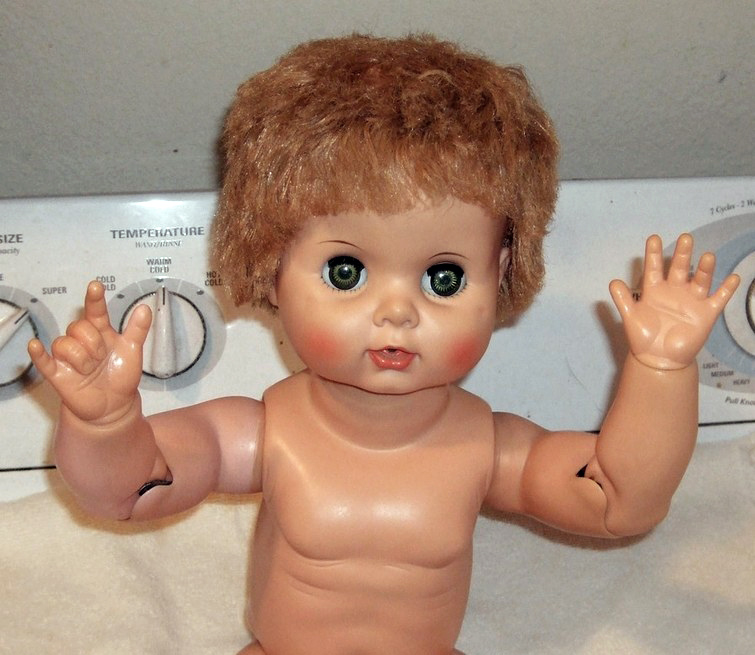
I am very pleased with this repair. My Baby Dollikin has good range of motion and can hold her arms in many positions. In fact, she might be even better than she was with the original parts!
Below are photos of the cord that we use. We have these supplies in our doll shop:
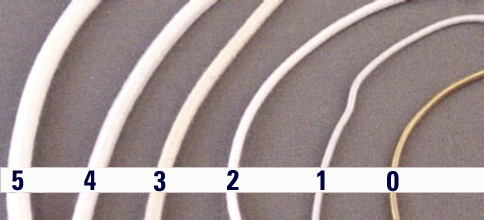
STRINGING CORD SIZES. YOU NEED SIZE 4 or 5 for Baby Dollikin.
Not A Play Doll
I would not recommend allowing children to play with a doll that has been repaired like this. The spring hooks are strong, but not so strong that they would not pull out if the child carries the doll by one arm. Spring hooks were originally designed for holding porcelain dolls together.
And, Baby Dollikin shouldn't be a playdoll anyway IMO. She's almost 55 years old, she's a collectible antique in dolly years. She has many metal parts that would rust if a child put the doll in water. (Baby Dollikin was also a drink and wet doll, which was a bad idea IMO, considering all the metal that's inside her.)
Our method of restringing the Baby Dollikin arm is a very good solution for a display doll. The solution should prove to be permanent, but if an arm does come loose, it's easy enough to restring her again using this method.

We have a special restringing kit for BABY DOLLIKIN in our doll shop. CLICK HERE.

