Restring Magic Attic Club Dolls
Lesson 6: Restring Variation:
Head and Arms Only

INTRODUCTION
What if the legs on your Magic Attic doll are tight and don't need restringing? Perhaps you only need to restring the head or arms: it's possible to do that. This page shows you how to restring the head by itself, but in order to do that you also need to remove the arms to gain access.
REMOVE THE ARMS
Follow our instructions in STEP 2, to remove the arms (first) and then the head (do not cut the cord that's in the doll's neck.)
- You need to remove the arms first, to find out what's inside the doll. If you take the arms off and the legs are still strung tight, then you can use the method described on this page.
- However, if you remove the arms and then the legs also come off: then you'll need to restring the entire doll.
PREP THE HEAD
Before you can restring the head, you need to prep the head. There are three possible situations...

NECK LOOP VARIATION #1
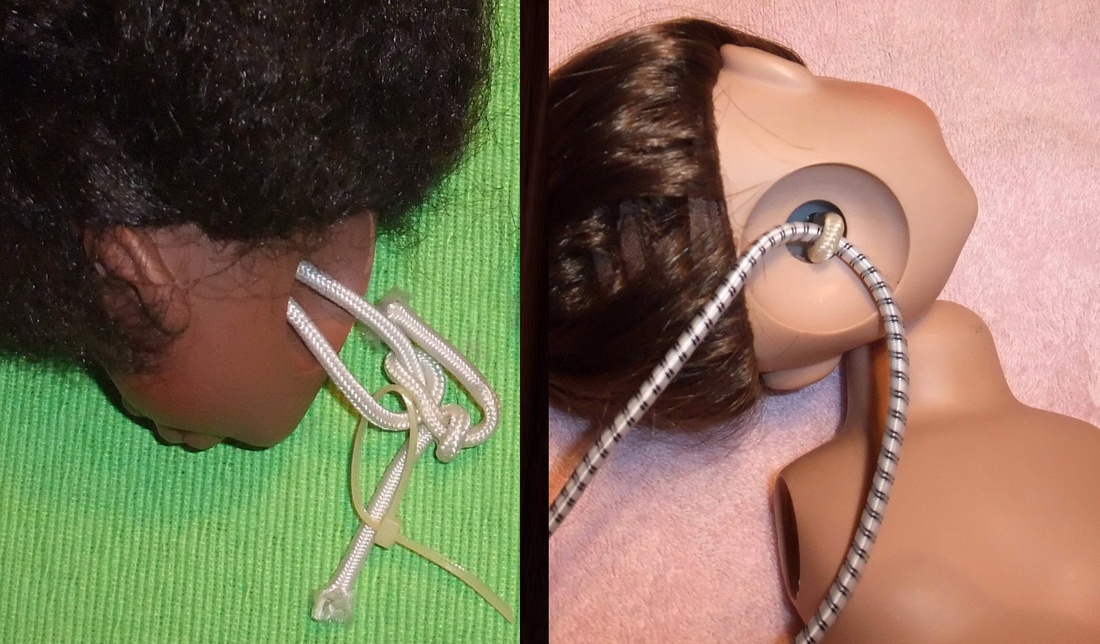
Above is a photo of two different Magic Attic heads. Some of the older MAC dolls have a long piece of cord hanging down from the head. Other dolls have a short loop of cord. Whatever your doll has, you can use what's there. If the cord is real long (like the Keisha doll on the left side of the photo) then tie it a little shorter and trim off the extra. Also remove any cable ties that might be attached.
NECK LOOP VARIATION #2
If the loop inside the head is short (like the Heather doll on the right side of the photo), then catch the loop with your hemostats and secure it with a piece of cord or ribbon until you're ready to work with it.
NECK LOOP VARIATION #3
Or, you may have a situation where you can't use the original pieces inside the head at all. If that's the case, remove any pieces that are inside the head. Make sure nothing is rattling around in there.
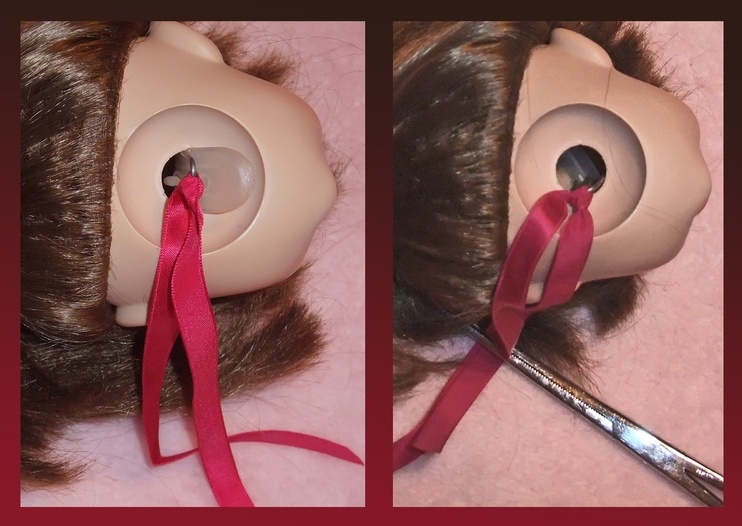
Then, use the plastic hook piece that is included with your Stringing Kit. You only need to use this hook if the original head pieces are unusable.

Attach a ribbon to the metal hook so you won't lose the piece inside the head.

Then push it inside the neck hole. It's a firm fit but it does slide in easily. Sometimes it helps to use pliers if fingers are getting in the way.
RESTRING THE HEAD

Cut a piece of stringing cord, approximately 12 inches long. Push the cord through the loop or hook in the head.

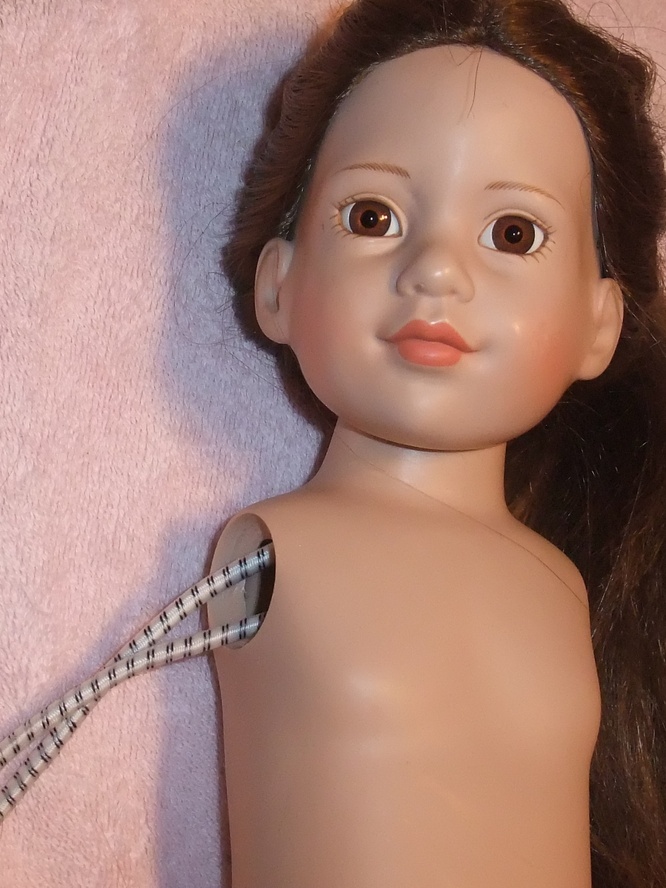
Then push both ends of the cord through the neck of the doll and out one armhole.

The photo above shows the parts that were inside the doll's neck (not from the head.) To restring the head, you will need the dark tan cup that was inside the neck. If you don't have this piece for some reason, then you can use one of the cups from an armhole. They're the same size.

Push both ends of the cord through the cup that was inside the neck. Then push ONE end of the cord through the wood bead. Push the neck cup and the wood bead through the armhole. Then push and pull everything together tight. Push the neck cup and the wood bead up into the neck and make sure those pieces are all the way up there.
Pull the cords again to make sure the head is snug - but not too snug or the doll's head may not move easily when you're done. Now tie both ends of cord together in a tight knot. Test the head to see if the tension is good. If the head is too loose or too tight you may want to untie the knot and try again.
Then finish the knot (I like to tie the knot a total of three times.) Trim off the extra cords, leaving at least an inch. Apply Elmer's glue to the knot if you have some.
Now the head is finished.
PREP THE ARMS
You need to remove rattley bits from the arms. Refer to STEP 2 again to learn how to do this.
Then follow our instructions in STEP 3, for inserting cord into the arms.
ATTACH THE ARMS
Follow our instructions in STEP 5 to reattach the arms... and then you're done!
(c) Copyright 2018 Cynthia A. Stevens all rights reserved.


