Restring Vintage Dolls: the Classic Method
This tutorial will show you how to do CLASSIC restringing, where the head, arms and legs of the doll all need to be restrung.
The method shown on this page will work for MANY vintage dolls, including composition and hard plastic dolls. The doll shown in the photos is 14 inches tall, but the method works for dolls of many sizes; 4 inches to 40 inches.

MATERIALS NEEDED:
- Hemostats or crochet hook
- Scissors
- Elastic cord
- Elmers Household Glue
- 1 Bead (optional)
CHOOSE THE CORD YOU NEED:
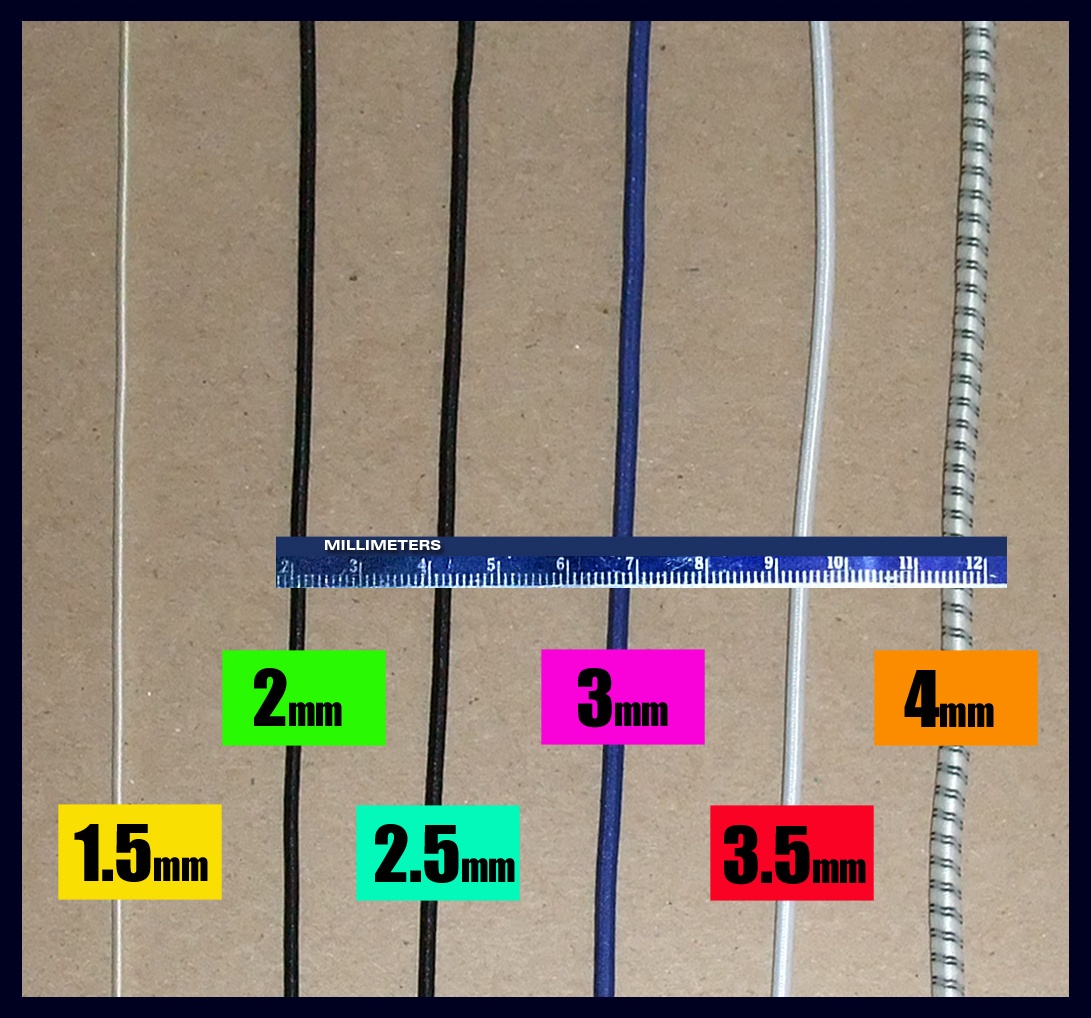
- 1.5 mm elastic cord is very lightweight cord for small dolls. It will string 4 to 6 inch dolls. It can be doubled if necessary, for 8 inch dolls.
- 2mm elastic cord is a good size for 8 to 10 inch dolls. This is a popular size for the 8 inch dolls such as Ginny or Alexanderkins.
- 2.5 mm elastic cord will string 10 to 18 inch dolls depending on how stocky they are. If it's a stocky 16-18" play doll then the 3mm is better. (There's not much difference between 2mm and 2.5mm.)
- 3mm elastic cord is comparable to 1/8 inch cord: this is strong cord and will string 14 to 18 inch dolls depending on how stocky or heavy they are. If you are stringing slender hard plastic fashion dolls, for example, then the 2.5mm might be enough.
- 3.5mm elastic cord is only slightly thicker than the 3mm size: but this is strong cord with more tension than the 3mm size.
- 4mm elastic cord is an all-purpose size for medium to large dolls. I use it for my 13 inch stocky Baby Face dolls, up to Playpal size if it's doubled.
If your doll is slender, you can use a smaller size.
If your doll is stocky, you might need a heavier size.
Cord can also be doubled if you need more strength
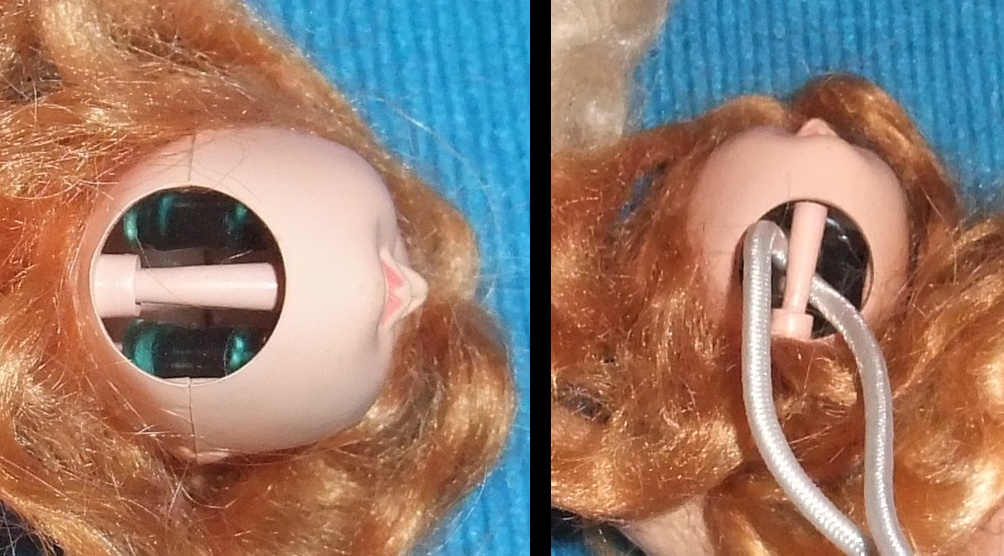
This view shows the inside of the head. There may be a BAR of some kind inside the head, or you might find a HOOK hanging down from a bar.
Use a crochet hook or small hemostat to thread your cord over the BAR and out again. Or, if there's a HOOK, then attach your cord to the hook.
Other mechanisms inside the head are for the eyes. Be careful that you don't get the cord wrapped around the eye mechanism.

So far so good... Next we will push the two ends of the cord into the neck hole on the body. But WAIT -- before you do that...
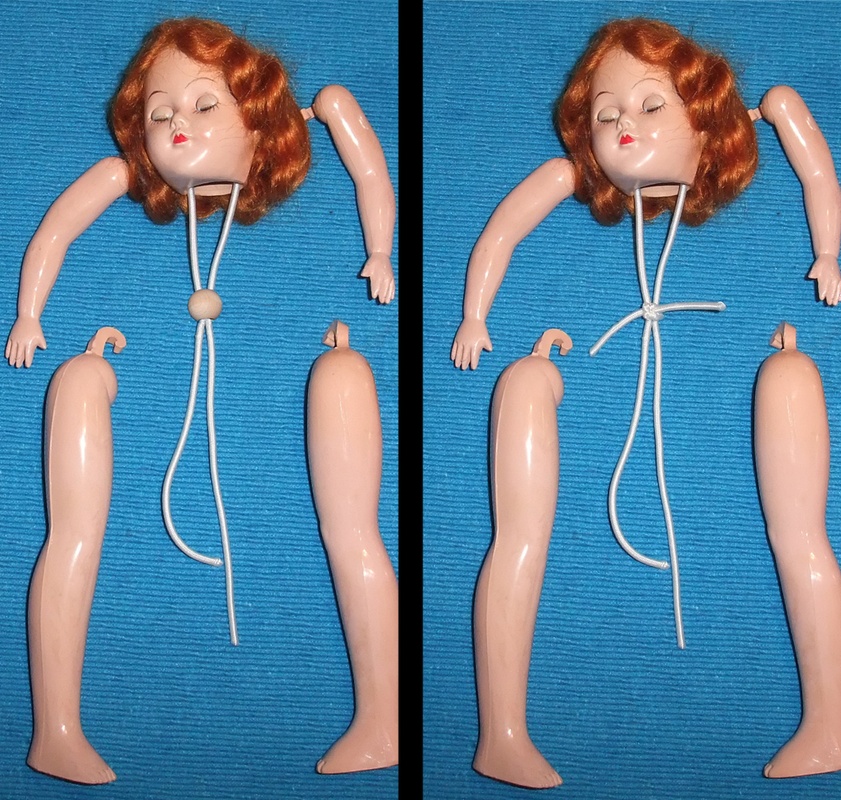
First I need to explain the bead. The bead will be inside the body, to hold the two lengths of cord together. Without this, the legs will tend to splay and look awkward. She might not be able to stand.
If you have a plastic or wood bead with a large enough hole, that's a good solution. But if you don't have a large bead, you can use a short length of elastic cord and tie it around the two cords. Don't tie it tight.
Whether you use a bead or a length of elastic cord, the two long cords need to slide easily when we get to the point where we tie things up.
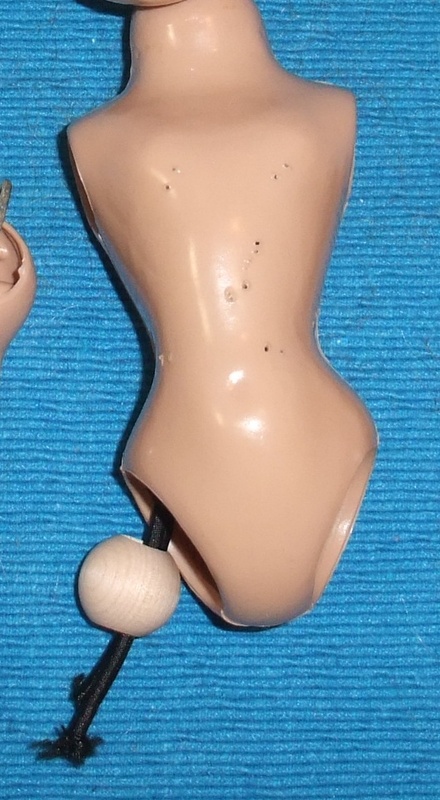
If you're using a bead, this is the time to slide the bead up into the body of the doll.
Thread your cords through the neck of the body and pull them out through one of the leg holes. The bead needs to slide onto BOTH cords and the bead should not be tight on the cords: it needs to slide fairly easily. If your bead is tight, use the other method.
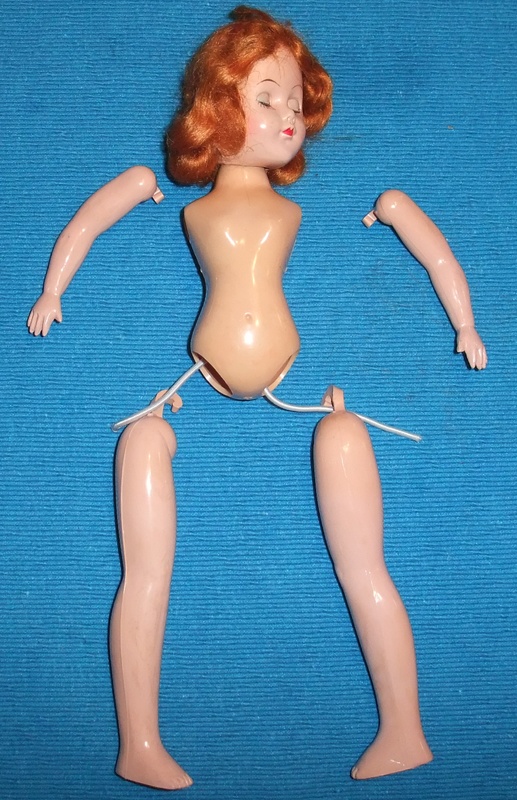
Push the bead inside. Next, pull the cords through the leg holes: one cord coming from each leg hole.
Double-check to make sure your right and left legs are on the correct side where they need to be.
Attach the cord on the hook of one leg and then thread that same cord through the leg holes to the other side.

Attach the other leg by it's hook and tie the cords together BUT do NOT tie a knot yet.
Now pull tight until the head and legs are all snug and tight against the body. You want the cords to be quite snug, but you don't want to pull them too tight or the doll won't stand and move properly. She will be stiff if the cords are too tight.
When you're satisfied with the tension, tie a knot. I usually tie a double or triple knot.
It's also a good idea to dab some Elmer's Household glue on the knot. Don't use superglue or model glue: it could damage the cord. Elmer's Household glue is a good strong glue (but don't use School Glue which is useless for real craft work.)
Trim the excess cord leaving about 1 inch. Stuff the ends inside the hip so the cords aren't showing.
Now we're ready to start the arms.
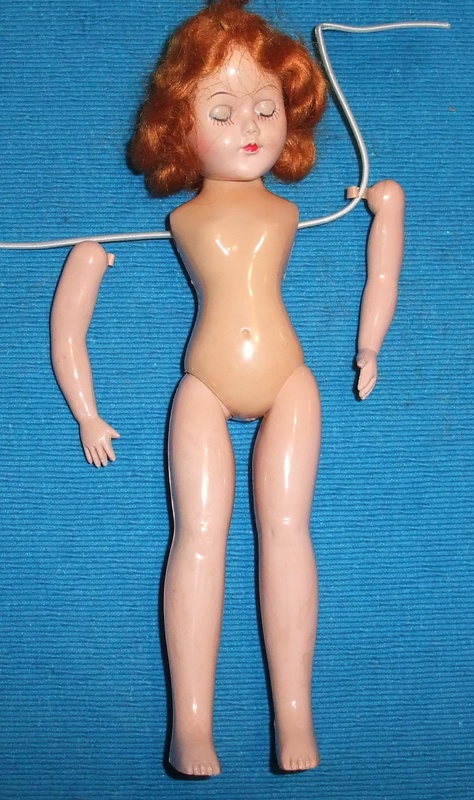
Cut a piece of elastic cord and hook one arm on it.

Thread both ends of the cord through the armhole, through the body and out the other side.

Hook the second arm on the cord. Then tie the cords together BUT don't tie a knot, yet. Pull the arms tight until they're snug against the body of the doll, but not too tight or her arms will be stiff.
Tie a double or triple knot and dab some Elmers to make sure the knot stays secure.
Cut off the excess cord, leaving approximately 1 inch. Stuff the ends inside the body of the doll.
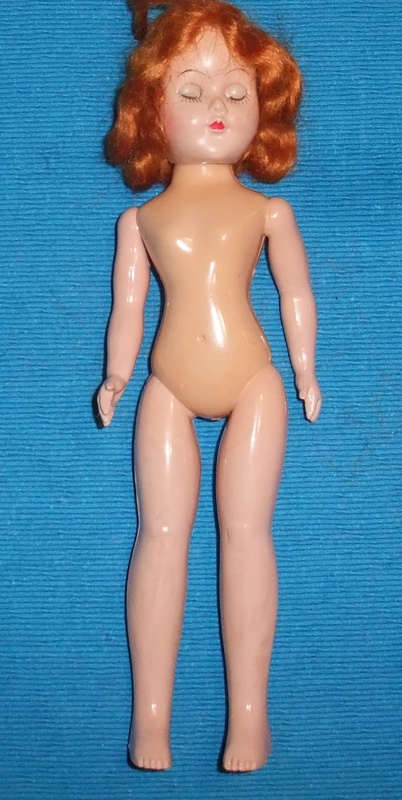
All done!


