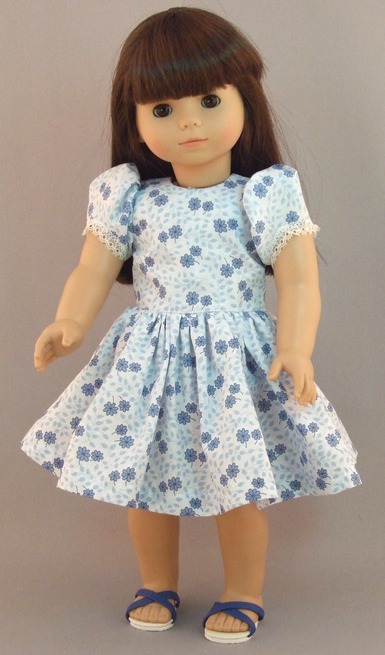
PrillyCharmin's
Basic Dress
Magic-10 & Magic-16
Doll Dress Pattern
Sewing Instructions
Designed by PrillyCharmin
Copyright 1999, 2001, 2009 Cynthia Stevens
Instructions for the MAGIC
Dresses Patterns
including dress with full skirt and panties.

     
DRESS SIZES:
DRESS
SIZE-1 = chest 4.5 inches
DRESS SIZE-2 = chest 5 inches
DRESS SIZE-3 = chest 6 inches
DRESS SIZE-4 = chest 7 inches
DRESS SIZE-5 = chest 8 inches
DRESS SIZE-6 = chest 9 inches
DRESS SIZE-7 = chest 10 inches
DRESS SIZE-8 = chest 11 inches
DRESS SIZE-9 = chest 12 inches
DRESS SIZE-10 = chest 13 inches
GETTING STARTED:
READ THIS ENTIRE PAGE. Look
over this entire instruction page before you
start. Instructions on how to cut the skirt are
further down the page. Instructions for Baby Face
Diapers (part of our Baby Face Pattern) are at
the bottom of the page.
CHOOSE A DRESS SIZE. The
MAGIC-10 dress pattern has 10 sizes. Measure
around the chest of your doll, then compare with
the size chart above. If the chest measures at a
half inch, then go up to the next size.
TRACE YOUR PATTERN onto the
Fabric. I like to trace the pattern onto
the fabric with pencil, lightly, and cut on the
pencil lines. (On an old video on YouTube, I saw
the seamstresses at Ideal doing the same thing as
they assembled clothing for the 1950's Betsy
Wetsy.)
Dolly clothes are so small that
it's easier to cut out the pieces when they're
traced, rather than try to cut around the paper
pattern pieces. And, it's more accurate.
You don't want to accidentally
make the pieces larger because even a little bit
of extra fabric can affect how it fits the doll.
Tracing the pieces helps you avoid enlarging the
pattern inadvertantly.
BODICE PIECES MUST BE ON THE
FOLD. Make sure your bodice pieces are
snug up on the fold of the fabric when you cut
them out. Otherwise your bodice may end up a lot
wider than you expected (or smaller.) I've had
dresses that were 1 or 2 sizes larger because
they were off the fold by a little bit. Baby Face
dolls are especially hard to fit with their
narrow shoulders, so this makes a big difference.
Any of the smaller sizes will be affected by how
accurately the bodice pattern is placed on the
fold.
SEAM WIDTH. We use a
seam width of approx. 3/16 inch (less than ¼
inch) for small dolly dresses. For our larger
dolls, the seam width is ¼ inch.
MAKE A PRACTICE DRESS FIRST. It is
advisable to make a practice outfit first to see
how the pattern works for you. If your fabric is
something special, then don't risk it. Make a
cotton print dress first so you can see how the
pattern works on your doll. There are thousands
of dolls in thousands of individual shapes, so
the pattern will most likely need a little
tweaking in order to be perfect.
DRESS SIZES:
DRESS
SIZE-1 = chest 4.5 inches
DRESS SIZE-2 = chest 5 inches
DRESS SIZE-3 = chest 6 inches
DRESS SIZE-4 = chest 7 inches
DRESS SIZE-5 = chest 8 inches
DRESS SIZE-6 = chest 9 inches
DRESS SIZE-7 = chest 10 inches
DRESS SIZE-8 = chest 11 inches
DRESS SIZE-8 = chest 11 inches
DRESS SIZE-9 = chest 12 inches
DRESS SIZE-10 = chest 13 inches
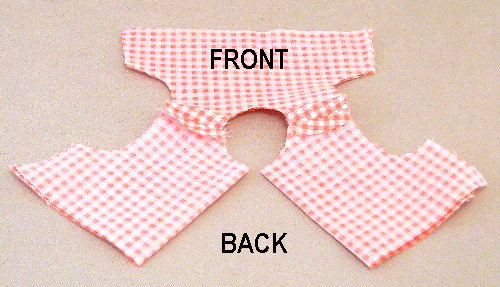
STEP 1: BODICE ASSEMBLY
As with all my dresses and shirts
for dolls, I make the top or bodice with double
fabric so it is fully lined front and back (no
messing with facings or interfacings this way.)

Stitch the front pieces to the
back pieces at the shoulders. All four pieces
will be connected at the shoulders (front, back,
front, back alternating) and then press the
shoulder seams flat.
Next, bring the right sides of
the fronts together. As you do this, the back
pieces will naturally need to fold in half. The
bodice opens in the back.
Stitch
all the way around the neck. Clip the curves.
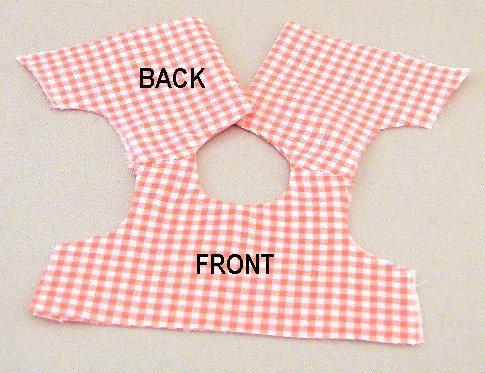
Then
turn the pieces right side out and press the
bodice flat.
ADJUSTMENTS: TRY
THE BODICE ON THE DOLL TO SEE IF THE NECK FITS
PROPERLY. This is the time to adjust the neckline
if necessary. Some dolls have a very fat neck
(infant dolls), so if you need to enlarge the
neck hole it needs to be done now. If the neck is
too small, turn the bodice inside out again and
adjust the neck hole as needed to make it larger.
You won't be able to adjust the
neckline after this point.

VARIATIONS. You
may insert lace, rickrack, ruffles or a
collar in the neck to dress it up. This
should be done while stitching the neck
hole. This photo shows rickrack edging,
for an old fashioned look.
STEP 2: SLEEVES
You may add some rickrack or
other trim to the sleeves. Gather the top edge of
the sleeves and attach to bodice armholes. Try to
arrange most of the gathers near the top. The
sleeve will look better that way. Be sure to
match the center top of the sleeve with the
shoulder seam.
BUBBLE SLEEVE:
Here are four photos of our
unique Bubble sleeve (in various sizes.) The
Bubble sleeve was inspired by antique doll
clothing. This is a puffed sleeve that does not
require elastic: it fits smoothly around the arm
of the doll, while the top of it is gathered into
a puff sleeve. Elastic tends to stretch out, so
we highly recommend using this bubble sleeve
pattern on doll dresses instead of the puffed
sleeves that need elastic.
You may finish the lower edge of
the bubble sleeve with bias tape, lace, rickrack
or other trims. You can also decorate the sleeve
with rosettes or ribbons.
Gather the top (rounded) edge of
the bubble sleeve, making note where the center
is so you can match it to the shoulder seam. Then
sew the sleeves to the bodice.
If you want the Bubble Sleeve to
be more poofy (or less poofy), you may use a
larger (or smaller) sleeve pattern. The MAGIC-10
pattern has 10 sizes, so you can use a larger
sleeve if you want more volume.
STEP 3: FINISH THE BODICE
Before you stitch the side seams,
you can add lace or trims to the front of it.
What you do with the front of your dress is what
will (most likely) make it very special and cute.
Here are some examples:
 
Left: rickrack and eyelet lace.
Right: two rows of pintucks.

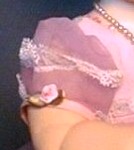
Left: rounded faux cummerbund
with fancy lace and trims.
Right: rounded faux cummerbund with matching bias
tape on sleeves.
After you have decorated the
front, it is time to stitch the side seams of the
bodice. You will sew the side seam on the sleeve
at the same time.
Next, put the bodice on the doll
to see how it fits. THIS IS THE TIME TO ADJUST
IT. If the bodice fits properly, the dress will
look more professional and less like a homemade
gown.
It's very easy to make
adjustments to our Dress patterns, because the
side seams are the key to good fit. So check the
FIT now. It's easy to adjust the side seam at
this point. After the skirt is attached, it's too
late.
When you are satisfied with how
the bodice fits, then finish the seam edges.
Sew velcro or snaps to the back
opening. Or, you could make tiny buttonholes with
buttons if there is enough overlap. (Some people
may prefer to add the velcro last, after the
skirt is attached.)
The bodice is finished.

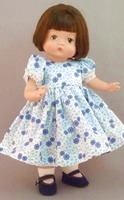
VARIATIONS. This
dress was originally made to fit our 18 inch Gotz
American Girl type doll, but the bodice was way
too long for this Marx First Love babydoll. The
babies do look better with a short bodice.
So we shortened it up by
stitching two rows of 1/4 inch pintucks. We
folded the bodice all the way across (front and
back), ironed it and stitched it at 1/4 inch.
Then folded it again, ironed it flat and stitched
the second row of pintucks. Then ironed the
pintucks flat again, when finished.
Not only do the pintucks look
cute, but the bodice is much shorter now. Of
course, we could have cut the bodice shorter, but
pintucks was more fun.
Also, notice that the right side
sleeve is too big around the arm. The lace gaps.
The bubble sleeve is very easy to adjust. Just
take it in a little under the arm. Only be
careful to leave enough room for the hand to fit
through.
STEP FOUR: CUTTING THE SKIRT
PIECE
Our pattern gives a general guide
for cutting the skirt piece but the length is up
to you, and depends on 1.) the height of the doll
2.) whether you want a long skirt or a short
skirt. 3.) whether you intend to finish the hem
with lace edging or you plan to turn back the
fabric and hem it. So these are decisions and
adjustments you need to make.
WIDTH of the
skirt fabric... If I'm using cotton prints, I use
the entire width of the fabric, which is 45
inches most of the time. For small dolls, there
will be some leftover but it's not that much. For
tall dolls such as the 18 inch American Girl or
Magic Attic dolls, the full width of the fabric
is just about right because you don't want as
much fullness for the pre-teen dolls.

The large sitting babydolls need
more fabric in their skirt, so it will fan out
around them. I use TWO pieces, the full width of
the fabric. Cut one piece in half and use it for
the back of the skirt: you don't want the front
of the skirt to have any seams. Seams should be
at the sides and center back, as shown in this
drawing:

Adjust for thin fabrics. If your
fabric is very thin, you may need to double the
amount of fabric in the skirt. We tested our
dress patterns using medium weight quilter's
cotton print fabrics. But if your fabric is
lightweight, such as cotton voile, you will need
approximately twice as much fabric in the skirt
width, in order to get the appropriate fullness.
If you are using very lightweight
fabric such as batiste, you may need to triple
the width of fabric in the skirt.
STEP FOUR: ASSEMBLE THE SKIRT
Add lace and ribbon trims to the
full skirt, if desired.
With larger dolls, you may want
to stitch the skirt closed part of the way in
back, so the dress is STEP-IN style.
For smaller dolls, we prefer to
leave the back open because it's easier to put
the dress on. The full skirt overlaps so it is
still very modest and doesn't need to be stitched
shut. Turn and stitch both ends of the skirt for
a neat edge on both ends.
Gather the top edge of the skirt
and attach to bodice.
Fold and stitch the hem of the
skirt or add lace to edge it.
Dress is Finished.
MAGIC-10 PANTIES
Designed by PrillyCharmin
Copyright 1999, 2009 Cynthia Stevens

Panties are all
one piece. Stitch lace around the legs to
finish the edges.
Stitch the side
seams (1/4 inch seams for larger
dolls...3/16 inch seams for the smaller
dolls.) You may want to try the panties
on the doll at this point to see if they
fit. Now is the time to take them in if
they're too big.
Stitch narrow
elastic, or lingerie elastic around the
waist. Small dolls will need very narrow
elastic, larger dolls will use 1/4 inch
elastic. You may stitch the elastic
around the top, or fold down the top edge
of the fabric approximately 1/4 inch and
stitch the elastic inside the panty.
That's it! Panties are very easy.
PANTY SIZES:
PANTY
SIZE-1 = hips 4.25 inches
PANTY SIZE-2 = hips 5 inches
PANTY SIZE-3 = hips 6 inches
PANTY SIZE-4 = hips 7 inches
PANTY SIZE-5 = hips 8 inches
PANTY SIZE-6 = hips 9 inches
PANTY SIZE-7 = hips 8.5 to 10 inches
PANTY SIZE-8 = hips 11 to 12.5 inches
PANTY SIZE-9 = hips 13 to 14.5 inches
PANTY SIZE-10 = hips 16 to 17.5 inches
MAGIC-10 BONNET
Designed by PrillyCharmin
Copyright 1999, 2009 Cynthia Stevens
 
Stitch the two
darts on the back of the bonnet. Stitch
the darts on the lining, also. Iron the
darts on both pieces.
Put the two
pieces together with wrong sides facing
each other. Pin together if necessary, or
stay stitch the two pieces around the
outer edge of the bonnet.
Finish the raw
edge with bias tape or self bias fabric. CLICK
HERE for
instructions on how to make your own bias
strips.
Add ruffled lace
or trims around the edge of the bonnet,
if desired.
Stitch ribbon on
both sides, where indicated (tuck the end
of the ribbon under so raw edge is not
exposed).
This is a very simple bonnet that
is very cute.
It has potential for many variations, if you wish
to be creative.
BONNET SIZES:
BONNET
SIZE 1 = 5-6 inches
BONNET SIZE 2 = 7-8 inches
BONNET SIZE 3 = 8-9 inches
BONNET SIZE 4 = 9-10 inches
BONNET SIZE 5 = 10-11 inches
BONNET SIZE 6 = 11-12 inches
BONNET SIZE 7 = 12-13 inches
BONNET SIZE 8 = 13-14 inches
CLICK HERE for 10 EASY TIPS TO
IMPROVE YOUR SEWING SKILLS.
|